Scapy Manager (scapy-man)


Step CA Manager using Python
Documenation: scapy.nikz.in
Secure bootstrapping with CA using Cloudflare Worker & WorkerKV
One important feature of Scapy is deployment of a Cloudflare worker using Cloudflare API and storing the CA information inside Cloudflare WorkerKVs.
When CA is generated, the fingerprint and local ca url are used for bootstrapping. Distributing this data securily to any machine which require bootstrapping is hard. This is where Cloudflare Proxy service is used to share this data securely to any number of branch offices which maybe link using VPN.
In the demo given below stepca.nikz.in(hosted in Google Cloud) is using a server certificate generated by a local Step CA. When executing deploy.sh, the Step CA root certificate inside data folder is deployed using a static html template. This is deployed using your own Cloudflare account and API Key. Hence resulting is a website like stepca.nikz.workers.dev. Only after boostrapping your computer using this link, you would be able to securly connect to stepca.nikz.in.
While using this feature, it also enables you to connect systems linked via VPN at different locations to be bootstrapped using same CA for secure connectivity.
Python Package
pip install scapy-man
Completion
scapy --completion
This command will install the shell completion. To activate the shell completion in currently working shell, run . ~/.bash_completion or source ~/.bash_completion.
Troubleshooting
If
scapynot found:export PATH=$PATH:$(realpath ~/.local/bin)If
pipnot found:sudo apt install python3-pip -yIf
python3-pipnot found:sudo apt update
Usage with Step CA
# Download deb packages
INSTALLATION_PATHS=$(scapy get step all -p)

# Install deb packages downloaded
sudo dpkg -i $INSTALLATION_PATHS

# Generate a password
scapy gen passwords

# Generate a basic worker file
scapy gen worker

# Export CA_NAME variable with CA Name
export CA_NAME="Scapy CA"

# Export domain names to use with this CA
export CA_DNS="$(hostname).local,localhost"

# Generate a new certificate authority
step ca init \
--name "$CA_NAME" \
--deployment-type standalone \
--dns "$CA_DNS" \
--address ":443" \
--provisioner admin \
--password-file $(scapy path password root) \
--provisioner-password-file $(scapy path password provisioner)

# Change default password of intermediate CA private key
step crypto change-pass $(scapy path key intermediate) -f \
--password-file $(scapy path password root) \
--new-password-file $(scapy path password intermediate)

# Export the FINGERPRINT variable with fingerprint of Root CA Certificate
export FINGERPRINT=$(step certificate fingerprint $(scapy path cert root))

# Deploy the Root CA and Fingerprint with CA URL to Cloudflare Edge server
scapy deploy --worker scapy --js worker.js

# Enable previllaged prot access for non-root users
sudo setcap CAP_NET_BIND_SERVICE=+eip $(which step-ca)

# Start Step CA server
step-ca $(scapy path config ca) --password-file $(scapy path password intermediate)
Commandline Interface
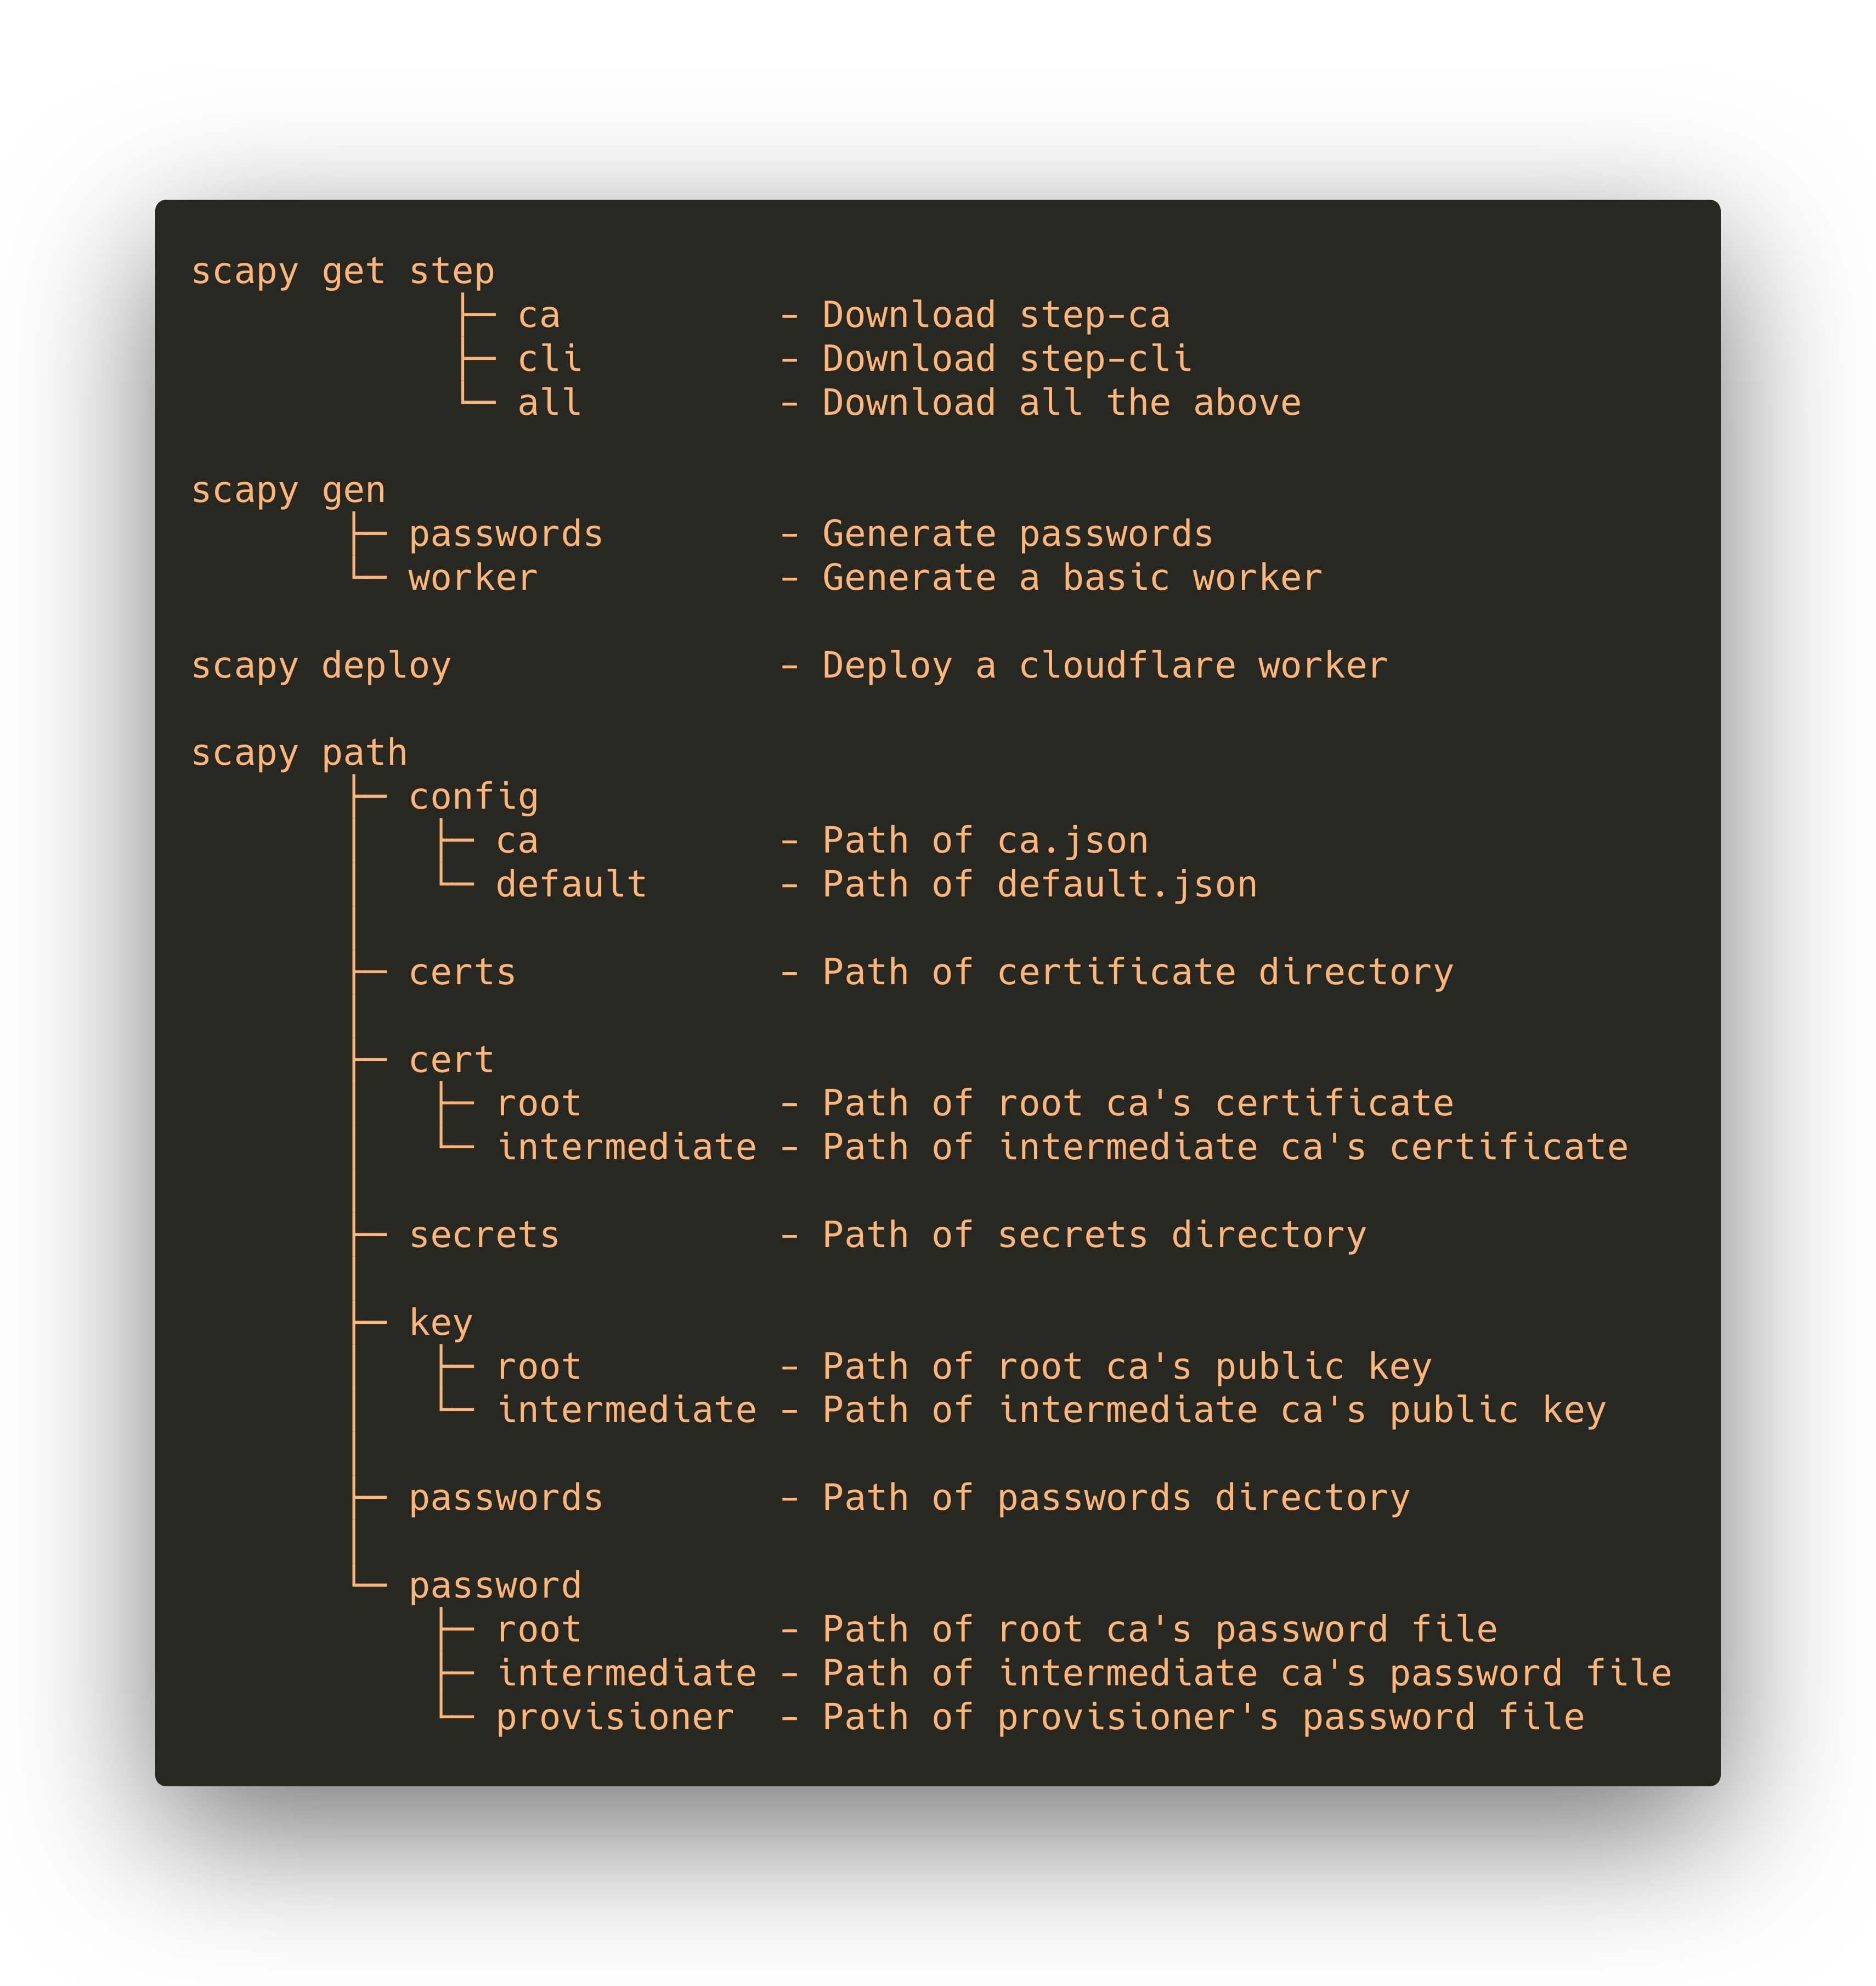 Scapy CLI
Development
git clone https://github.com/nikhiljohn10/scapy
cd scapy
pip install poetry
poetry update
Demo
poetry run bash examples/deploy.sh
You will be asked to provide a Cloudflare Token to upload the worker. The worker will be uploaded to your Cloudflare Account and deployed to Cloudflare Edge Network.
If successully deployed, you will find a url where the demo CA Root certificate and hosted. Install this certificate in systems to access stepca.nikz.in.